
 1")

-22%


Dr. Heater DR966 240-volt Hardwired Shop Garage Commercial Heater, 3000-watt/6000-watt, DR966 240V, Black
Original price was: $124.99.$97.00Current price is: $97.00.
- Free Shipping over $25
- Fast & reliable delivery options
- Enjoy top quality items for less
- Multiple safe payment methods

- Brand: Dr Infrared Heater
- Special Feature: Programmable Thermostat, Manual Thermostat, Overheat Protection, Adjustable Tilt Head
- Color: Black
- Product Dimensions: 14.5″D x 13″W x 14.5″H
- Recommended Uses For Product: Office, Shop, Restaurant, Garage, Greenhouse
- Power Source Corded Electric: Heating Method Forced Air
- IDEAL SIZE: Hardwired; Power cord not included in the unit. Dimensions: Overall Height – Top to Bottom: -14.5″. Overall Width – Side to Side: -13″. Overall Depth – Front to Back: -14.5″.
- TEMPERATURE SETTINGS: Adjustable Thermostat with HIGH and LOW Setting. A dynamically 8 inch fan provide maximum air flow with minimum turbulence and noise, gently distributes warmth through your area
- POWERFUL AND SAFE: Generates up to 20,520 BTU using 6,000 watts of power. UL/CUL Listed Wall or Ceiling Mounted Heater; Bracket Include
- NO SETUP: Comes ready to use right out of the box and includes wall or ceiling mounting bracket
| Color | Black, Gray |
|---|
15 reviews for Dr. Heater DR966 240-volt Hardwired Shop Garage Commercial Heater, 3000-watt/6000-watt, DR966 240V, Black
Add a review
Related products
-36%

Original price was: $149.95.$96.00Current price is: $96.00.
-27%
Original price was: $132.03.$97.00Current price is: $97.00.
-29%


Original price was: $132.99.$94.00Current price is: $94.00.
-30%


Original price was: $66.99.$46.89Current price is: $46.89.
-30%
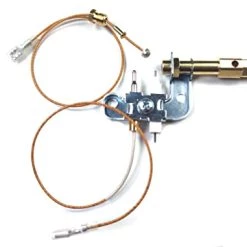
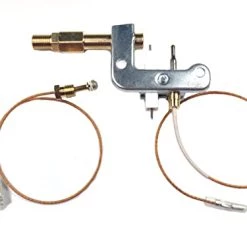
F273401 73404 Pilot Assembly For Portable Buddy Mr Heater MH9B MH9BX And Dewalt Small Propane Heater
Original price was: $26.55.$18.59Current price is: $18.59.
-43%


Original price was: $158.99.$91.00Current price is: $91.00.
-30%
Original price was: $50.99.$35.69Current price is: $35.69.
-30%

Original price was: $98.04.$68.63Current price is: $68.63.
Triumph675 –
My garage is a slightly oversized 2 car garage. Vinyl plank on the floor, insulated and drywalled walls, insulated ceiling without drywall, doors and windows are sealed. The garage door is solid wood and is sealed at the top, bottom and the sides. I would say my garage is very well insulated. I ran a dedicated circuit to the heater and I have 200 amp service to the house.I honestly am not that happy with the unit but now that is it installed I will keep it, if it dies I will get the Fahrenheit unit. The hanging bracket is a little flimsy. The built in thermostat is ok. You can turn it off on the thermostat if you turn it all the way counter-clockwise, so no need to use the breaker.Now for the heat. We are having a very mild winter in PA and I have never put it on low. It is always on high. The fan is fairly quiet. It does not throw the air far at all, maybe 8 feet and that is being generous. I feel it should cook you at 3 feet if you stand there for a minute but it doesn’t. It is like a powerful hair dryer. It does get the garage to 65-70 degrees after 30 minutes when it is 40 degrees in the garage. I feel as if it should do it faster and maintain it better for the amount of power getting to the unit. You really should mount this unit near your main working area. It is 10-15 degrees colder on the opposite side of the garage.The coils after running for 15 minutes or so reach 320 degrees, as tested with infared temp gun. I feel like it should get hotter. I called the company to verify if the temperature at the coils is correct. They couldn’t answer the question and said no one has ever asked. They asked the tech department and they didn’t know the answer. They said they would call me back with an answer. They never did. I called back a week later and they quickly answered yes to get me off the phone. No too happy about that.It does work better than my kerosene heater without the bad smell and costs less to use. It does not work better than my small propane jet heater, but is more quiet and doesn’t need venting. So far the cost to run the heater is between $10-$30 a month. It’s nice not to have to run out and get propane and kerosene. Overall, I am happy I switched to electric, I just wish the unit performed better but maybe I am expecting too much.
dogwood –
Just bought this heater on Amazon a week ago and I like it so much I decided to do a video featuring it.Video located on YT at youtube .com /watch?v=eMxGk6wr7g4entitled How to Heat A Workshop by Dogwood TalesTwo things to consider in buying a space heater – the require BTU and the electrical cost to heat your space.You can go here to calculate your estimated BTU need – calculator .net/btu-calculatoror just look up “BTU calculator’ on line and there are other BTU calculators as well.The BTU is what is pretty much required to effectively and efficiently heat to the temperature range you are comfortable with. It’s a matter of the maximum degrees you want to raise the temperature. In my case I wanted to be able to increase the ambient temperature in my woodworking workshop from 40 degrees to 65 degrees and I have less than favorable insulation in this workshop, so my desired BTU is 16,359 at 4,794 watts. This heater meets that demand quite nicely.As for cost, as I mention in the video (link above) the two ceramic space heaters were costing me about $1.56 per evening to heat my workshop. This heater is costing me only about 92 cents for the same length of time. I have immediate savings of over 62 cents per evening of use! Why the huge difference? Because the other two space heaters had to run continuously at combined 3,000 watts for 2 hours to heat the space and then continuously to maintain the desired temperature. The Dr Heater DR966 bring s my workshop from 40 to 60-65 degree in a half hour at 6,000 watts and then only runs intermittently at 3,000 watts to maintain that temperature. Therefore I am using less electricity to heat my shop to 65 degrees and to maintain that temperature.I have my heater connected to a 30amp circuit breaker and have had no issues with the electrical demand of the heater tripping the breaker. But I am also using a six-foot long 6-gauge cord from the heater to the outlet and 8-gauge wire from the outlet to the breaker and the outlet is mounted directly underneath the sub-panel, so there virtually no distance from the breaker to the six-foot cord.If the BTU suppl of this heater meets your BTU demands I recommend that you get this heater and see for yourself what it’s like to have a well heated work space. It’s nice!
SDeck –
I installed this in a 3 car garage with a 14 foot ceiling. After insulating the garage about 80%, this heater keeps it at about 50F when set just under halfway on the dial and power switch on “high”. Nighttime lows are in the teens. Seems to run for 5 mins or so at a time maybe 2-3 times an hour. If I turn it up, the garage gets to shorts and tee shirt temps.It is surprisingly quiet. It’s mounted directly to the ceiling under my daughter’s room and she can’t hear it run.Installation instructions are poor at best. Some online instructions call for 10/3 wire. That is wrong. Use 10/2 (red/black/ground, no neutral). The heater only has three wires, red (hot), black (hot), green (ground). Wire by color. I used a double pole 30 amp breaker, but instructions call for 35 amp. I couldn’t find one to fit my panel.I discovered a couple things that clarify the wiring immensely when reading about 240V wiring. I’m not an electrician, do the details may not be exact but I think it helps to clarify some things.1. 240V single phase does not use a neutral. If you are running wire to a 240V outlet and plan on putting a plug on you heater, you may want to run 10/3 in case you want the neutral later for something that uses 240V and 120V. Just don’t connect it to anything. This is why some 240V plugs have 3 connectors (only use 240V) and some have 4 (they use 120V and 240V)2. Breaker panels have 2 sides for a reason. Each is 120V. If you connect one hot and one neutral, you get 120V. If you connect 2 hots (1 from each side of the panel) you get 240V.3. The slots in the vertical stack of breakers alternate which side they draw from so a double pole breaker taking up 2 slots is 240V (one hot from left side, one from the right side). Note: a double pole breaker taking up a single slot (space-saver) is only 120V.4. Make sure you know the manufacturer of your panel before buying your breaker. They are not standard.5. It does not have an off switch. Code in many places requires a disconnect switch to be installed in the circuit near the appliance. I did not because it is mounted right above my breaker panel.
goose –
This heater works just OK in my 625 sq. ft. insulated attached 2-car garage but it leaves cold spots throughout the space. It doesn’t seem to be moving enough air, I’ll probably need to add a ceiling fan or some type of circulation. I have it mounted on the corner ceiling on the back wall which is opposite the two garage doors. The only problem was that on each side of the garage and in front of the doors you felt cold, but in the direct line of sight of the heater it felt warm.The heater fan is loud in my opinion (can even hear it from the other side of the garage door). The fan operates at the same speed whether you have the thermostat set to High or Low and the wattage at 3000 or 6000 watts.When set to 3000W on High you can barely feel heat coming from the fan but it did warm up the garage by 2 degrees in about 10 minutes when it was 31 degrees outside. On 6000W you can really feel the heat even standing 6 feet away, you know its running. The garage went from 48 to 64 in 2 hours when set to high on 6000W and it was just below freezing outside. After 2 hours on the highest settings, the temp of the heater box (the outside of it) was only 75 degrees but the coils were upwards of 200+ (I checked with a heat gun).You must understand that you can only REALLY power off this unit by shutting off the breaker (or unplugging it if you wired a plug and outlet). There is no OFF button and the instructions clearly state that you’ll need to shut it off by the breaker. Note; this doesn’t necessarily mean that the unit will run all the time, it just won’t actually be “OFF”.Wiring: I read at least 20 reviews about wiring and many many people said to use 10/2 wire with a 30 Amp breaker so that is what I ordered and as soon as I unboxed this unit it states all over it and in the instructions that you MUST use 8/2 wire and 35 Amp double pole breaker! There’s one review on here from an apparent electrician who also states the same. I know the math doesn’t really add up to going that route, but you cannot go wrong by following manufacturer instructions.About the garage: It is 25′ x 25′ with 9′.9″ ceilings. R-19 insulation (2×6 framing), 6 mil vapor barrier and 1/2″ sheetrock on the 3 outside walls (one of which has two standard garage doors (hardly insulated) and a 28″ fiberglass entrance door. The 4th wall is to the house which is fully insulated and has 5/8 fireblock etc.. The roof: R-30, 6 mil vapor barrier with foam rafter vents in the roof rafters (2×8) which is above the attic crawlspace and has 1/2″ plywood floor which is over the garage ceiling which has 1/2″ sheetrock.
Tyler Worman –
The comments between the heaters are getting mixed.The 966 does not have a remote.The 966 has a built in thermostat and no direct way to hookup an external thermostat.To the reviewers stating the 966 does not get hot enough, the thermostat is on the bottom of the unit and hits temp before the rest of your room does so it turns off. Some people modify the thermostats on the bottom. In the 6kw mode you can’t readily hook these to a line thermostat because it can be too much current draw (measured with meter on real unit).The instruction manual has been revised from what is posed here and on their website. The new units come with a manual stating using 35 Amp breaker and 8/2 wire is necessary. That would also mean that you can’t use the linked locking 30A socket that one reviewer shows and be to code. I have had the unit on a meter when running and have not observed it to actually draw that much even after extended run times.Mounting… the new book states that it needs to be 8ft from the floor. So you can’t install it in a room with 9ft ceilings because it hands ~16 inches on it’s own if you mounted it right to the ceiling. It also states to keep at least 1-2 ft from the back wall with or without using the mounting bracket. Additionally it can’t be closer than 1-2 ft from any other vertical wall. With these constraints you can’t actually use the mounting bracket in one of the orientations shown in step 9 of the manual. As an added bonus the troubleshooting page says “Unit produces a burning smell?”, “Ensure a minimum clearance of 36 inches from sides and rear wall of the heater” so that definitely rules out most mounting solutions. They should really take a second look at their instructions.The small work area to make the connections in back of the heater is too small to fit 3 lugs (8 guage wire) forcing you to splice in using wire nuts. You can just barely fit an 8/3 rubberized cable in the back if you plan to put it on a locking plug end.The proper locking 50 amp plug ends tend to run significantly more than their 30 amp counterparts. If you really plan to do this right then you should expect to spend a significant amount on plugs/sockets or hardware it as the instructions said.The version that takes an external thermostat is $100 more. I can’t figure out why as it otherwise looks like the same exact unit. I’m tempted to open the thermostat up and remove the built in one.An otherwise great heater spoiled by a crappy thermostat and horrible instructions. Almost sent it back.
MadPB –
I was a little worried after reading some reviews that said this didn’t put out heat because of whatever (loose wires, bad thermostat, or ???)I’m happy to say mine arrived and everything on the outside looked fine. I did go ahead and remove the plastic cover where the controls are all wired up so that I could check for any loose wiring before installing. Everything looked good and seemed to be attached just fine. I didn’t try wiggling anything (couldn’t really get my fingers in there) but I was satisfied.Wired it up and it’s putting out great heat, about what I’d expect.As for the wiring, I used a 10/3 SOOW cord going into an L6-30 locking plug. The outlet uses the matching L6-30 receptacle. Where the wire goes into the unit, I picked up a 3/4″ (that’s 3/4″ *trade size* to fit the 1″ *actual size* hole in the wiring panel) strain relief cord connector. See this as an example – this is what I used (Amazon has a terrible price on this… local big-box stores should have this in stock for just a few bucks): https://www.amazon.com/HALEX-FETZER-27697-Relief-Connector/dp/B00KWX5EHOIt clamps the cord in place and then attaches to the heater opening using the lock nut.Or you could direct wire it, in which case getting a pre-wired 10/3 6′ long whip is probably a good time saver. Just make sure the connector on the end that goes to the heater is a 3/4″ trade size (again, that’s for a 1″ hole).One other thing – I read other reviews that mention an unfortunately placed screw jutting into the compartment where you wire it up. Honestly, that’s just a TERRIBLE design. A sharp screw end, right where the wires go? Seriously? I saw someone used a plastic wall anchor, but I used some insulation from the 10 gauge wire I stripped and shoved that on the screw. Tight fit, should stay there and it’ll keep that screw from piercing anything and shorting. Dr. Heater *really* needs to fix that.
Booglefloop –
Greetings heater fans. I tracked the temperature in my garage for two days with this heater running at its highest setting. On day one the outside temperature was 35 degrees Fahrenheit, and the temperature inside the garage started out at 45. On day two it was 34 outside and started out inside at 43. On both days it was late-morning with cloudy conditions.My two car garage is 21×23 feet with 8’4” ceilings, or 4025 cubic feet (149 cubic yards). The garage is attached to the house, with three of the four walls exposed to the outside. It is uninsulated. We live in the southwest at 5,700 feet elevation.I had the heater professionally installed at a cost of $391 (too much, maybe?). A 40 amp circuit was added to my workshop sub panel and number 8 wire was used. Back in my youth I did a lot of my own electrical work, but nowadays I take fewer chances. If you know what you’re doing, though, it seems to be a simple job.Bottom line: In the above conditions, on both days this heater added 12 degrees when run for roughly 45 minutes, at which time the trend leveled off. On day one it went from 45 to 57, and on day two it went from 43 to 55. This will serve my purposes, but was a bit disappointing. However, it is likely that a 6000 watt garage heater from virtually any manufacturer would deliver similar results in my garage. If I did it again, I might go for a higher wattage unit. Yesterday it was warmer outside (about 45) and the heater kept my shop at 70.Attached is a photo of the installed heater, and the trend graphs.Conclusion: While this heater will not have you wearing Bermuda shorts and Hawaiian shirts while working wood in the wintertime, if you put on a flannel shirt and jeans you can certainly get things done comfortably when it is in the 30s outside.
ZombieKLR –
I’ve had the Dr. Heater DR966 for 2 weeks. It was easy to install and within about 10 minutes of turning it on I realized it would be a gamechanger for my garage workshop (in Montana). The garage is well insulated but was otherwise unheated. Normally when outdoor temperatures dip to zero, the garage temperature drops to around freezing, which basically made it useless for trying to use hand tools with bare hands. The new Dr. Heater puts out plenty of heat. I generally run it at 6000 watts for about 20 minutes and then drop it back to 3000 watts and back off on the thermostat. Then I stay out there in comfort for hours… My only very minor concern with the construction of this unit is that a sharp sheet metal screw sticks into the enclosure for the wire connections. Although unlikely, I figured that it was possible for a wire to come in contact with the sharp screw point and combined with years of vibration from the fan, the wire insulation could erode and allow a short. I fixed this by simply reversing the screw so that the point was on the outside. I would not at all consider that screw a reason not to buy this unit. The general quality seems very good. I’m sure every garage heater has some kind of manufacturing quirk. I chose this unit because I noticed that there were very few reviews describing outright failures, unlike many of the other space heaters on Amazon. I made a guess that because this one was lower cost and simpler that it may therefore be less prone to failure. So far, so good. I currently have complete confidence in what I’ve bought. As far as wiring, I noticed 10 gauge wiring in the unit. I already had approximately 15 feet of 10 gauge AWG coming from my circuit box and a 30A 240V breaker. I’ve used this heater a lot the last 2 weeks without tripping the circuit breaker or heating up the wiring. Would I buy it again???: YES. P.S.: I made the effort to give you a thorough review because I literally read about 100 outstanding reviews about this and other space heaters.
Thomas W Schroeder –
This was a great heater for my garage and here are few details about the unit that I had a tough time nailing down elsewhere. (I paid about $168)1) Each louver can be moved independently.2) The louvers get hot in use, but are not too hot to be moved by hand while the unit is set to 6000 watts.3) It does NOT get hot behind the unit though I believe the instructions require 4 inches behind the unit. (also the instructions stated it should be a minimum of 8 feet off ground level! – I have not figured that one out. Mine is a little less than that).4) The knockout on the back electrical panel is 3/4″.5) I easily found a 35 AMP breaker (Square D) and used 8 gauge wire (both per installation recommendations). The recommendation for 35 AMP breaker and 8 gauge wire satisfies national guidelines for heating devices that might run continuously (so wire for 25% more AMPS than the math would indicate). If I were to deviate, I think I would always use 8 gauge wire, but a 30 AMP breaker. I would NEVER use a 40 AMP breaker (as some people said they did) and especially never use a 40 AMP breaker with 10 gauge wire. You always want your breaker to trip before you wire is overheated so never use lower gauge wire.6) It did come with two anchors (and no wire nuts), but mine were “sleeve” anchors, not lag screws. I was not familiar with using sleeve anchors and had a poor install by trying to use them. (I drilled a 1/2 hole as the sleeves were 1/2 inch, but I feel like 15/32 would have been better, but I did not have a 15/32 bit). As I tightened the anchors it seemed like they were pulling out too much so I stopped tightening them. I was suspicious that sleeve anchors are used only for concrete, so I researched the issue and now feel that is correct. I will have to replace them with lag screws. Why they provided sleeve anchors instead of lag screws is not clear to me. But if you have a concrete beam in your garage, you’ll be set!7) The rheostat/temperature setting knob is very useful but has a lot of play. As an example, when the unit is running and one wants to turn if off, one must turn down the knob quite a lot before the unit shuts off (the edge of the knob swings through about 3/4 of an inch of arc before the unit shuts off). The same is true for forcing it back on. Once it is set though, it generally seems to maintain the temperature I was looking for.8) Finally, my garage build is typical. I insulated the walls, but left the ceiling uninsulated and it is vented at the eaves and crest. Obviously, the crest vent will let out a lot of heat and draw in cold are at the eaves. While this unit heats my 360 Sq ft garage well, I would not want anything smaller on a very cold day. I am glad I went with 6000 watts instead of 4000 or 5000. On a 45 degree day, an being physically active, I used an initial 6000 watt warm up and then 3000 watts on a low intermittent setting. I have not used it yet on a 10 degree day but am glad I have the 6000 watts when that time comes.
Fillmore2 –
I use this heater in an insulated 24′ by 26′ garage in Wisconsin, R19 walls and R23 ceiling. I have been using the heater in the 6000W mode so that it cycles less although the cost per btu output should be equal regardless of setting. I keep the garage about 52 degrees F all winter and the heater does the job without issue including -29 F this last winter. Electric cost has been about $140/month in January and progressively less per month as the weather warms in the spring. I did have one issue after about 3 to 4 weeks of use. The heater gave off a very strong smell of burning plastic although I could not see any sign of hot wires and overheating. I call the service number and Suprise! A human answered after a few rings. I explained my issue and he waked me through what to check while remaining on the phone, We could not find an issue so he recommended that I run it until it failed allowing me to find the problem and return it. I did as he recommended and after a few hours the smell went away and it has worked fine for the last 5 months. Great heater and great service. I recommend this heater if electric is your energy choice. Hope this helps.
A. Messersmith –
I actually bought five of these heaters, one 5000W, two 6000W and two 7500W from various manufacturers. I ended up keeping the one from Doctor Heater and returned the others based on air flow, fan quality, and overall build quality. The Doctor Heater ones only have two heat settings and don’t have all the bells and whistles the others do, but I felt like does a better job at heating up my garage and will last longer. The extra airflow is key I think. The other brands don’t move the air well enough IMO. Too weak of fans.
JDoss –
I waited several months of use before writing this review. It was relatively easy and straightforward to install. If you’ve got any electrical ability. I installed it on the wall where the knob was just low enough that I could reach it to keep the kids away from it. I did install it close to the breaker box in my shop so that I could run a minimal amount of wire, 6’ and wire direct to a breaker. It heats quite well. I’m using it in a 1400 square-foot foam insulated shop open ceiling. it does a pretty good job in there. Would be even better in a smaller shop I may add a second one. I like it enough I’m going put one in my 900 square-foot insulated garage and since the garage isn’t an open ceiling like the shop, it should warm the garage quite well. It was definitely a good buy for the money it keeps the area that I work in most, at my workbench, quite comfortable. The heat output is quite good even standing 12 to 15 feet away you can definitely get a good warm even hot breeze coming off of it. I would definitely buy again. The thermostat works quite well. I don’t understand the complaints. Yeah there is some play between the shut off and turn it back on positions but that’s normal in all dial thermostats. I don’t see the need of wiring in their regular home type thermostat. The built-in one works just fine.
Joshua C. –
Got us through a rough winter
Heath Nelson –
Fits and works perfectly for what I need
JoeBug –
Works very well, but keep an eye on your electric bill! This uses alot of energy to heat up a 20×20 garage space